Exporter Configuration#
This page provides commonly requested flow and metadata configuration details, as requested by our customers.
NetFlow Configurations#
AdTran NetVanta Router#
The Adtran NetVanta Router supports NetFlow v9. For more information, please refer to the Adtran Web Site.
Only enable egress flows (i.e. no ingress) on Adtran routers. More information can be found on page 27 of the Adtran Configuration Guide.
APCON Appliance#
Aruba Appliance#
Big Switch#
Blue Coat MACH5#
Check Point Appliance#
Check Point Firewall#
Cisco 4605 series with a daughter card configured with VLANs#
Bandwidth needs to be set explicitly at the VLAN:
ip route-cache flow infer-fields
ip flow ingress infer-fields
Cisco 7600 router#
If you plan to export NetFlow statistics, globally enable NDE on the router by issuing the following commands:
configure terminal
ip flow-export destination
ip flow-export version
mls nde sender version
Enable NetFlow on individual interfaces by issuing the following commands:
configure terminal
interface
ip flow ingress
(Optional) To configure NetFlow sampling, do the following:
Enable sampled NetFlow globally on the router (mls sampling).
Enable sampled NetFlow on individual interfaces (mls netflow sampling).
Verify the NDE configuration to ensure that it does not conflict with other features such as QoS or multicast. Use the show ip interface command to verify the configuration.
These and other related commands can be found in the Cisco 7600 Series Cisco IOS Software Configuration Guide.
Cisco ACI#
Cisco APIC#
Cisco ASA FireSIGHT#
Cisco ASA Firewall#
Cisco ASA Firewall (using ASDM)#
Cisco ASR 1000#
Cisco ASR 9000#
Cisco Catalyst 2960-X#
Cisco Catalyst 3750 with a 3KX module#
Cisco Catalyst 3850#
Cisco Catalyst 4500#
Cisco Catalyst 4510 Switch IOS XE 3.6#
Cisco Catalyst 4948E switch#
Cisco Catalyst (4000 Series running in Hybrid or Native Mode)#
Configure the switch the same as an IOS device, but instead of the command
ip route-cache flow
Use the following command:
ip route-cache flow infer-fields
This series requires a Supervisor Engine IV with a NetFlow Services daughter card to support NDE.
Cisco Catalyst Switch (non-4000 Series)#
Are you running CatOS? Yes
Router side:
Enter the following global commands.
ip flow-export source
ip flow-export version 5
ip flow-export destination
ip flow-cache timeout active
Enter the following command on each physical interface. You will need to log into each interface one at a time.
ip route-cache flow
Switch side:
set mls nde
set mls nde version 5
set mls flow full
set mls agingtime long 128
set mls agingtime 64
set mls bridged-flow-statistics enable
set mls nde enable
No
Enter the following global commands (all commands are entered in the router config -t option).
ip flow-export source
ip flow-export version 5
ip flow-export destination
ip flow-cache timeout active 1
mls nde sender version 5
mls flow ip interface-full
mls nde interface
mls aging long 64
mls aging normal 64
Enter the following command on each physical interface. You will need to log into each interface one at a time.
ip route-cache flow
Cisco Catalyst 6500/6000 Series Switch#
Catalyst 6500/6000 Switches NetFlow Configuration and Troubleshooting
Cisco Catalyst 6509 Switch#
Cisco Catalyst 9300 Switch#
Cisco IWAN#
Cisco Nexus Series 1000#
Cisco Nexus Series 7000#
Cisco documentation on how to enable NetFlow on Nexus 7000. The following Plixer blogs also provide information on this process:
Cisco Router (Cisco IOS)#
Enable Cisco Express Forwarding:
router(config)# ip cef
In the configuration terminal on the router, issue the following to start NetFlow Export.
It is necessary to enable NetFlow on all interfaces through which traffic you are interested in will flow. Now, verify that the router is generating flow stats—try ‘show ip cache flow’. Note that for routers with distributed switching (GSR’s, 75XX’s) the Rendezvous Point CLI will only show flows that made it up to the RP. To see flows on the individual linecards use the ‘attach’ or ‘if-con’ command and issue the ‘show ip cache flow’ on each LC.
Enable export of these flows with the global commands. ‘ip flow-export source’ can be set to any interface, but the one which is the least likely to enter a ‘down’ state is preferable. NetFlow will not be exported if the specified source is down. For this reason, we suggest the Loopback interface, or a stable Ethernet interface:
router(config)# ip flow-export version 5
router(config)# ip flow-export destination
router(config)# ip flow-export source FastEthernet0
Use the IP address of your NetFlow Collector and configured listening port.
If your router uses BGP protocol, you can configure AS to be included in exports with command:
router(config)# ip flow-export version 5 [peer-as | origin-as]
The following commands break up flows into shorter segments.
router(config)# ip flow-cache timeout active 1
router(config)# ip flow-cache timeout inactive 15
Use the commands below to enable NetFlow on each physical interface (i.e. not VLANs and Tunnels, as they are auto included) you are interested in collecting a flow from. This will normally be an Ethernet or WAN interface. You may also need to set the speed of the interface in kilobits per second. It is especially important to set the speed for frame relay or ATM virtual circuits.
interface
ip route-cache flow
bandwidth
Now write your configuration with the ‘write’ or ‘copy run start’ commands. When in enabled mode, you can see current NetFlow configuration and state with the following commands:
router# show ip flow export
router# show ip cache flow
router# show ip cache verbose flow
Cisco Wireless LAN Controller#
Cisco Zone-Based Firewall#
ESX Server running VMware#
Exinda Router#
Extreme (Enterasys) N-series DFE/S-series (native NetFlow in ASIC)#
DFE and S series netflow commands
set netflow export-interval 1
set netflow export-destination 2055
Enable NetFlow on each type of interface on the switch. For example:
set netflow port fe.*.* enable
set netflow port ge.*.* enable
set netflow port tg.*.* enable
set netflow port lag.*.* enable
set netflow cache enable
set netflow export-version 9
set netflow template refresh-rate 50 timeout 1
NOTE: There is no performance impact to the switch because the flow creation and accounting is a native function of the ASIC. For more information, please refer to our “How to Enable NetFlow on an Enterasys SSR” guide.
Extreme Networks Router#
To enable the flow statistics feature on a switch, use the following command:
enable flowstats
The flow statistics feature is disabled by default.
To disable the flow statistics feature on a switch, use the following command:
disable flowstats
To enable the flow statistics function on the specified port, use the following command:
enable flowstats ports
The flow statistics function is disabled by default.
To disable the flow statistics function on the specified port, use the following command:
disable flowstats ports
A single port can distribute statistics across multiple groups of flow-collector devices. This NetFlow distribution capability makes it possible to create a collection architecture that scales to accommodate high volumes of exported data. It also offers a health-checking function that improves the reliability of the collection architecture by ensuring that only responsive flow-collector devices are included in active export distribution lists. The distribution algorithm also ensures that all the ingress flow records for a given flow are exported to the same collector.
NetFlow distribution is enabled by configuring export distribution groups that identify the addresses of multiple flow-collector devices. You can configure up to 32 export distribution groups on a BlackDiamond 6800 series switch, and each group can contain as many as eight flow-collector devices.
To configure the export groups and flow-collector devices to which NetFlow datagrams are exported, use the following command:
config flowstats export <group#> [add | delete] [ | ] port
The group# parameter is an integer in the range from 1 through 32 that identifies the specific group for which the destination is being configured.
You can use the add and delete keywords to add or delete flow-collector destinations.
To export NetFlow datagrams to a group, you must configure at least one flow-collector destination. By default, no flow-collector destinations are configured. To configure a flow-collector destination, use either an IP address and UDP port number pair or a hostname and UDP port number pair to identify the flow-collector device to which NetFlow export datagrams are to be transmitted. You can configure up to eight flow-collector destinations for each group. When multiple flow-collectors are configured as members of the same group, the exported NetFlow datagrams are distributed across the available destinations.
To configure the IP address that is to be used as the source IP address for NetFlow datagrams to be exported, use the following command:
config flowstats source
By default, flow records are exported with the VLAN interface address that has a route to the configured flow-collector device. Depending on how it is configured, a flow-collector device can use the source IP address of received NetFlow datagrams to identify the switch that sent the information.
The following command example specifies that the IP address 192.168.100.1 is to be used as the source IP address for exported NetFlow datagrams.
config flowstats source 192.168.100.1
Flow records are exported on an age basis. If the age of the flow record is greater than the configured time-out, the record is exported.
To configure the time-out value for flow records on the specified port, use the following command:
config flowstats timeout ports [ | any]
The time-out value is the number of minutes to use in deciding when to export flow records. The default time-out is 5 minutes.
The following command example specifies a 10-minute time-out for exported NetFlow datagrams on port 1 of the Ethernet module installed in slot 8 of the BlackDiamond switch.
config flowstats timeout 10 ports 8:1
To reset the flow statistics configuration parameters for a specified Ethernet port to their default values, use the following command:
unconfig flowstats ports
To display status information for the flow statistics function, use the following command:
show flowstats {detail | group <group#> | ports }
where:
detail Use this optional keyword to display detailed NetFlow configuration information.
group# Use this optional parameter with the group keyword to display status information for a specific export group.
portlist Use this optional parameter to specify one or more ports or slots and ports for which status information is to be displayed.
If you enter the show flowstats command with none of the optional keywords or parameters, the command displays a summary of status information for all ports.
The summary status display for a port shows the values for all flow statistics configuration parameters for the port.
The summary status display for an export group includes the following information:
Values for all configuration parameters
Status of each export destination device
The detailed status display for an export group includes the summary information, plus the following management information:
Counts of the number of times each flow collector destination has been taken out of service due to health-check (ping check) failures
The source IP address configuration information
For more information, please refer to Extreme Networks documentation and support at http://www.extremenetworks.com
Extreme S-Series, N-Series, and K-Series#
Extreme NetFlow configuration for S-Series, N-Series, and K-Series
Fatpipe Wrap#
Fortiswitch-500#
HP 9300#
Ixia Appliance#
Juniper Router#
Juniper supports flow exports by sampling packet headers with the routing engine and aggregating them into flows. Packet sampling is achieved by defining a firewall filter to accept and sample all traffic, applying that rule to an interface, and then configuring the sampling forwarding option.
     interfaces {
     ge - 0 / 1 / 0 {
       unit 0 {
         family inet {
           filter {
             input all;
             output all;
           }
           address / (
           }
         }
       }
     }
     firewall {
       filter all {
         term all {
           then {
             sample;
             accept;
           }
         }
       }
     }
     forwarding - options {
       sampling {
         input {
           family inet {
             rate 100;
           }
         }
         output {
           cflowd {
             port;
             version;
           }
         }
       }
     }
For more information on configuring Juniper routers, refer to: http://www.juniper.net.
Meraki#
MikroTik Router#
Below are examples of how to enable Traffic-Flow on a router.
Enable Traffic-Flow on the router:
[admin@MikroTik] ip traffic-flow> set enabled=yes
[admin@MikroTik] ip traffic-flow> print
enabled: yes
interfaces: all
cache-entries: 1k
active-flow-timeout: 1m
inactive-flow-timeout: 15s
[admin@MikroTik] ip traffic-flow>
Specify IP address and port of the host, which will receive Traffic-Flow packets:
[admin@MikroTik] ip traffic-flow target>
add address=192.168.0.2:2055 \
\… version=9
[admin@MikroTik] ip traffic-flow target> print
Flags: X – disabled
# ADDRESS VERSION
0 192.168.0.2:2055 9
[admin@MikroTik] ip traffic-flow target>
For further information see our blog MikroTik NetFlow Support.
Palo Alto Firewall#
pfSense Firewall#
Riverbed Steelhead Appliance#
(config)# ip flow-export destination interface
(config)# ip flow-export enable
Silver Peak WAN Optimizer#
Softflowd Netflow Probe#
Talari Appliance#
Velocloud Appliance#
Viavi Observer GigaStor#
vSphere 5 Server and want to use vMotion on multiple network adapters#
Watch the video here, it explains the NetFlow piece starting at ~10.20.
Learn how to enable NetFlow on vSphere
vSwitch#
Vyatta Core 6 software#
Configuration
     system {
     accounting {
       interface {#
         multi - value sampling - rate# sample 1 in N packets,
           default
       }
       syslog - facility facility netflow {
         version < 1 | 5 | 9 > #
           default 5 engine - id# 0 - 255 server {#
             multi - value port#
           }
         timeout {
           expiry - interval#
           default 60 flow - generic#
           default 3600 icmp#
           default 300 max - active - life#
           default 604800 tcp - fin#
           default 300 tcp - generic#
           default 3600 tcp - rst#
           default 120 udp#
           default 300
         }
       }
       sflow {
         agentid server {#
           multi - value port#
           default 6343
         }
       }
     }
sFlow Configurations#
Alcatel Switch#
Enter your Scrutinizer server information:
sflow receiver 1 name address udp-port packet-size 1400 version 5 timeout 0
Receiver Name can be set to any one-word string you want (e.g. Scrutinizer). Port should be set to 2055 by default. Packet-size should be set to 1400, version should be 5, and timeout should be 0.
Next, configure a sampler on all desired interfaces:
sflow sampler 1 receiver 1 rate 1 sample-hdr-size 128
So, if you wanted to configure ports 18 and 35 to sample for a switch with a single blade and 48 ports, you would enter:
sflow sampler 1 1/18 receiver 1 rate 1 sample-hdr-size 128
sflow sampler 1 1/35 receiver 1 rate 1 sample-hdr-size 128
Finally, configure one poller to get sFlow counters:
sflow poller 1 receiver 1 interval 5
Write configuration to switch:
write memory
Arista Switch#
Blue Coat Packeteer Packet Shaper of Proxy#
Brocade ICX series#
I found that this config works on the MLXe series of routers and some ICX. sFlow is sampled NetFlow and with Brocade the sample rate is dependent on the interface speed. With a higher sample rate, we will not see as granular data as we would with regular NetFlow. We recommend getting as close to 1 as possible for the best data. This may not be ideal for some users. Please keep in mind the current workload on your device before setting your sample rate to 1 to 1.
Sample Config:
(config)# interface ethernet 1/1 to 1/8fgs
(config-mif-0/1/1-0/1/24)# sflow forwarding
(config-mif-0/1/1-0/1/24)# exit
(config)# sflow destination <Scrutinizer's IP Address> 2055
(config)# sflow sample <value 1 to X>
Link speed |
Sampling Rate |
|---|---|
10 Mb/s |
1 out of 200 |
100Mb/s |
1 out of 500 |
1 Gb/s |
1 out of 1000 |
10 Gb/s |
1 out of 2000 |
(config)# sflow polling-interval 30
(config)# sflow enable
You can also use the following command to list the configuration settings:
fgs# show sflow
I have found this configuration consistent across all of the MLXe series devices,along with compatibility with the ICX series (formerly Ruckus).
Brocade MLXe series#
I found that this config works on the MLXe series of routers and some ICX. sFlow is sampled NetFlow and with Brocade the sample rate is dependent on the interface speed. With a higher sample rate, we will not see as granular data as we would with regular NetFlow. We recommend getting as close to 1 as possible for the best data. This may not be ideal for some users. Please keep in mind the current workload on your device before setting your sample rate to 1 to 1.
Sample Config:
(config)# interface ethernet 1/1 to 1/8fgs
(config-mif-0/1/1-0/1/24)# sflow forwarding
(config-mif-0/1/1-0/1/24)# exit
(config)# sflow destination <Scrutinizer's IP Address> 2055
(config)# sflow sample <value 1 to X>
Link speed |
Sampling Rate |
|---|---|
10 Mb/s |
1 out of 200 |
100Mb/s |
1 out of 500 |
1 Gb/s |
1 out of 1000 |
10 Gb/s |
1 out of 2000 |
(config)# sflow polling-interval 30
(config)# sflow enable
You can also use the following command to list the configuration settings:
fgs# show sflow
I have found this configuration consistent across all of the MLXe series devices,along with compatibility with the ICX series (formerly Ruckus).
Cisco Nexus 3000#
For information on enabling sFlow on a Cisco Nexus 3000, view the Cisco Nexus configuration guide.
Cisco UCS server#
Cumulus Networks OS#
Dell switch#
Review the following sFlow setup guides depending on which series router you have:
D-Link DGS-3627 or DGS-3650 switch#
For information on enabling sFlow on supported D-Link switches, please review the sFlow section of the DGS-36XX User Manual V2.00, as well as our D-Link sFlow Configuration Guide.
Extreme (Enterasys) B3/C3/G3/B5/C5 Series switch#
sFlow is only supported on Enterasys B3/C3/G3 series switches running firmware 6.3.1 or above. For information on enabling sFlow on these supported Enterasys® switches, please review the sFlow section of the Enterasys® SecureStack™ Configuration Guide, beginning on page 28-4.
Example Configuration for B5/C5 SecureStack™ hardware
The general procedure for configuring sFlow includes:
Configure your sFlow Collector information to be used by the sFlow Agent on the switch. Up to eight Collectors can be configured. The information is stored in the sFlowReceiverTable.
Enable and configure sFlow packet flow sampling instances on each port.
Enable and configure sFlow counter sampling poller instances on each port.
The following is an example of the commands used to configure sFlow:
configure sFlow Collector 1 accept defaults for datagram size and port
set sflow receiver 1 owner enterasys timeout 180000
set sflow receiver 1 ip 192.168.16.91
configure packet sampling instances on ports 1 through 12 assign to sFlow Collector 1
set sflow port ge.1.1-12 sampler 1
set sflow port ge.1.1-12 sampler maxheadersize 256
set sflow port ge.1.1-12 sampler rate 2048
configure counter poller instances on ports 1 through 12 assign to sFlow Collector 1
set sflow port ge.1.1-12 poller 1
set sflow port ge.1.1-12 poller interval 20
ExtremeXOS Switch#
View the PDF Guide, which references the commands to configure sFlow on Extreme Switches.
For more Extreme commands, view the ExtremeWare Command Reference Guide.
Force10 Switch or Router#
The following commands configure a Force10 switch/router with IP address 1.1.2.2 to sample at 1-in-512 and send the sFlow packets to Scrutinizer with IP address 1.1.1.1 over UDP port 6343:
Force10(conf)#sflow collector 1.1.1.1 agent-addr 1.1.2.2
Force10(conf)#sflow sample-rate 512
Force10(conf)#sflow enable
sFlow must then be enabled on every interface that should be sampled:
Force10(conf-if-gi-0/0)#sflow enable
To list the configuration settings use the command:
Force10#show sflow
sFlow services are enabled
Global default sampling rate: 512
Global default counter polling interval: 20
Global extended information enabled: none
1 collectors configured
Collector IP addr: 1.1.1.1, Agent IP addr: 1.1.2.2, UDP port: 6343
20088 UDP packets exported
0 UDP packets dropped
3940 sFlow samples collected
0 sFlow samples dropped due to sub-sampling
Linecard 0 Port set 0 H/W sampling rate 512
Gi 0/0: configured rate 512, actual rate 512, sub-sampling rate 1
Fortinet Firewall#
Read the Would you like to have some traffic visibility on your Fortinet Firewall? blog to get NetFlow setup instructions for the Fortinet Firewall.
Foundry Switch#
There are only 3 commands to enable sFlow on Foundry gear.
Enable it globally
(config)# sflow enable
Configure a destination
(config)# sflow destination x.x.x.x
Enable it on port(s)
(config)# interface eth 1 (or for multiple ports (config)# interface eth 1 to 48)
(config-if-1)# sflow forwarding
For more Foundry commands, view the Foundry Command Reference Guide.
H3C MSR Series Router#
View the [02-IP Services Volume(V1.05) Command Manual](https://web.archive.org/web/20160305034304/http://h3c.com/portal/technical_support___documents/technical_documents/routers/h3c_msr_50_series_routers/configuration/user_manual/h3c_msr_wcg-release_2207(v1.05)), which details the commands to configure sFlow on H3C MSR Series Routers.
H3C S12500 Series Switch#
View the [13-Network Management and Monitoring Command Reference](https://web.archive.org/web/20160304190140/http://h3c.com/portal/technical_support___documents/technical_documents/switches/h3c_s12500_series_switches/configuration/operation_manual/h3c_s12500_cg-release7128-6w710/12/201301/772702_1285_0.htm), which shows how to setup sFlow on H3C S12500 Series Routers.
H3C S5500-E1 or S7500-E Series Switch#
| View the [PDF Guide](https://media.plixer.com/resources/configs/H3CsFlowConfigurationGuide.pdf), which references the commands to configure sFlow on H3C supported equipment.
HP Procurve Switch 2800 or 5300 series#
IMPORTANT:
2800 Series must be running Software Revision I.08.105 and Firmware (ROM) version I.08.07 5300 Series must be running Software Revision E.10.37 or higher
For information on enabling sFlow on 2800 or 5300 series HP Procurve Switches, download this ZIP file and review the PDF inside for further instructions.
HP Procurve Switch 5400, 3500 or 8200 series - running K code#
HP has added support for configuring sFlow directly on the CLI.
From config mode:
Configure destination collector
sflow [1-3] destination [IP-addr] [udp-port-for-sflow]
Where 1-3 is the sFlow instance, IP-addr is the address of the Scrutinizer collector, and udp-port-for-sflow is the number of the listening port of the collector. example:
sflow 1 destination 192.168.1.1 6343
Activate Sampling
sflow [1-3] sampling [ports list] [N]
Where 1-3 is the sFlow instance, ports list is the port(s) setup for sFlow, and N is the number of sampled packets (to sample every 100 packets set N to 100). example:
sflow 1 sampling all 100
Activate Polling
sflow [1-3] polling [ports list] [N]
Where 1-3 is the sFlow instance, ports list is the port(s) setup for sFlow, and N is the number of interval (in seconds) between polling intervals. example:
sflow 1 polling all 60
Save Configuration
write mem
HP Procurve Switch 5400zl, 3500yl and 6200yl#
For information on enabling sFlow on supported HP Procurves, view the ProCurve Networking FAQ.
Juniper Switch or Router#
For instructions on how to enable sFlow on supported Juniper routers and switches, please review Configuring sFlow Technology for Network Monitoring (CLI Procedure).
Juniper EX 3200 switch#
The following configuration enables sFlow monitoring of all interfaces on a Juniper EX3200 switch, sampling packets at 1-in-500, polling counters every 30 seconds and sending the sFlow to an analyzer (10.0.0.50) on UDP port 6343 (the default sFlow port).
     protocols {
     sflow {
       polling - interval 30;
       sample - rate 500;
       collector 10.0 .0 .50 {
         udp - port 6343;
       }
       interfaces ge - 0 / 0 / 0.0;
       interfaces ge - 0 / 0 / 1.0;
       interfaces ge - 0 / 0 / 2.0;
       interfaces ge - 0 / 0 / 3.0;
       interfaces ge - 0 / 0 / 4.0;
       interfaces ge - 0 / 0 / 5.0;
       interfaces ge - 0 / 0 / 6.0;
       interfaces ge - 0 / 0 / 7.0;
       interfaces ge - 0 / 0 / 8.0;
       interfaces ge - 0 / 0 / 9.0;
       interfaces ge - 0 / 0 / 10.0;
       interfaces ge - 0 / 0 / 11.0;
       interfaces ge - 0 / 0 / 12.0;
       interfaces ge - 0 / 0 / 13.0;
       interfaces ge - 0 / 0 / 14.0;
       interfaces ge - 0 / 0 / 15.0;
       interfaces ge - 0 / 0 / 16.0;
       interfaces ge - 0 / 0 / 17.0;
       interfaces ge - 0 / 0 / 18.0;
       interfaces ge - 0 / 0 / 19.0;
       interfaces ge - 0 / 0 / 20.0;
       interfaces ge - 0 / 0 / 21.0;
       interfaces ge - 0 / 0 / 22.0;
       interfaces ge - 0 / 0 / 23.0;
     }
   }
Visit blog.sFlow.com for more information on configuring sFlow on Juniper switches.
ZyXEL Appliance#
NetStream Configurations#
3com Router or Switch#
NetFlow (AKA NetStream) is supported on the 5000 & 6000 routers via a software upgrade and on the 8800 Switch via an NMM module.
To configure NetStream on a 3Com 5012 router, use the following sample configuration:
ip netstream export source interface
ip netstream export host
Then activate NetStream on each specific interface you want to obtain statistics from. For example, on the Serial0/0 interface, use the following command.
interface s0/0
ip netstream inbound
This will export inbound NetStream traffic statistics related to the Serial0/0 interface of the 3com router to the workstation running Scrutinizer.
IPFIX Configuration#
Avaya Router#
Avaya WLAN 8100 Wireless Controller#
Barracuda Firewall#
Blue Coat Crossbeam Appliance#
Blue Coat Crossbeam configuration
Brocade 5600 vRouter#
Cisco NGA 3240#
Visit the command reference page or click here
Citrix NetScaler sending AppFlow (IPFIX)#
You can configure IPFIX on your Citrix NetScaler device using this setup guide.
Ecessa Appliance#
Emulex EndaceFlow 3040#
EndaceFlow 4004#
Extreme Switch#
IPFIX support is available on the BlackDiamond 8900 G96Tc, G48T-xl, G48X-xl, and 10G8X-xl modules and Summit X460 and X480 switches.
To configure whether to meter on ingress and/or egress ports, use the following command:
configure ip-fix ports [ingress \| egress \| ingress-and-egress]
# The default is ingress.
To configure whether to meter all, dropped only, or non-dropped only records, use the following command:
configure ip-fix ports record [all \| dropped-only \| non-dropped]
# The default is all
F5 Networks Big-IP System#
This configuration guide
Fortinet Switch#
Gigamon Appliance#
These blogs provide information on the process.
IBM Proventia Network Intrusion Prevention Appliance#
Juniper MX240, MX480 or MX960 running JUNOS Release 10.2#
To configure inline flow monitoring, include the inline-jflow statement at the [edit forwarding-options sampling instance instance-name family inet output] hierarchy level. Inline sampling exclusively supports a new format called version-ipfix that uses UDP as the transport protocol. When you configure inline sampling, you must include the version-ipfix statement at the [edit forwarding-options sampling instance instance-name family inet output flow-server address] hierarchy level and also at the [edit services flow-monitoring] hierarchy level.
The following operational commands include new inline fpc keywords to display inline configuration information: show services accounting errors, show services accounting flow, and show services accounting status.
To learn more click here for a listing (and description) of all features that have been added to JUNOS Release 10.2.
Juniper MX series post release 14.1X55#
Juniper vMX#
Microsoft Event Logs#
Nortel ERS 5500 & 8600 series routers#
This Configuration Guide shows how to enable IPFIX using Java Device Manager (JDM) or with the Command Line Interface. (See Chapter 4).
NOTE: The 5500 series only supports IP packet sampling resulting in lower than actual utilization trends.
Utilization can be understated on Nortel IPFIX capable equipment. To fix this issue, review the hash overflow document.
nProbe#
Open vSwitch#
This document on Open vSwitch explains the process
Procera Appliance#
Saisei Networks Appliace#
Solera DeepSee Appliance#
SonicWALL#
The current supported models are TZ210, NSA240, 2400, 3500, 4500, 5000, NSA E-5500, 6500, 7500, 8500 running 5.8.0.1 or later.
Read the SonicWALL documentation on NetFlow and IPFIX support.
Sophos UTM Firewall#
Configuring IPFIX on your Sophos UTM is done by enabling the IPFIX Accounting Feature.
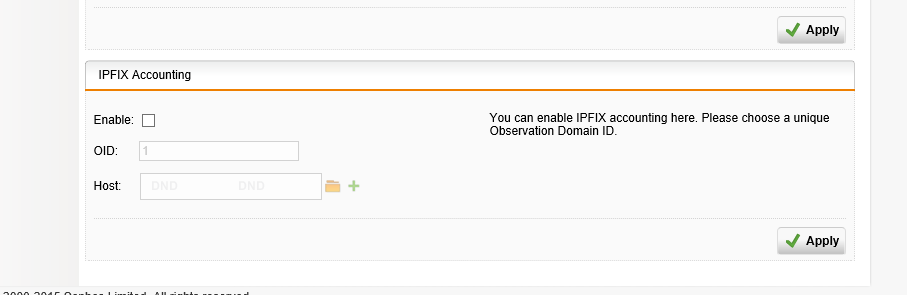
Read the Sophos documentation on IPFIX support. Page 126 outlines the IPFIX accounting feature.